How to Grow Luffa Plant and Make Your Own Natural Sponge
Imagine this… You step into your bathroom, grab a sponge, and start your morning routine. But this isn’t just any sponge—it’s one you grew with your own hands. No synthetic materials, no microplastics, no chemicals. Just a natural, homegrown luffa that’s gentle on your skin and kind to the planet.
There’s something deeply satisfying about using something you nurtured from a tiny seed. It’s more than just a sponge—it’s a small step toward self-sufficiency and sustainability. Plus, growing luffa isn’t just practical; it’s a rewarding journey that connects you with nature in a hands-on way. Whether you’re looking to reduce waste, avoid synthetic products, or simply enjoy the process of gardening, cultivating luffa can be an incredibly fulfilling experience.
In This Article
- What is Luffa?
- Why Grow Luffa?
- How to Grow Luffa: Step-by-Step Guide
- Processing Luffa Into Sponges
- Recent Developments in Luffa Processing
- Conclusion
What is Luffa?
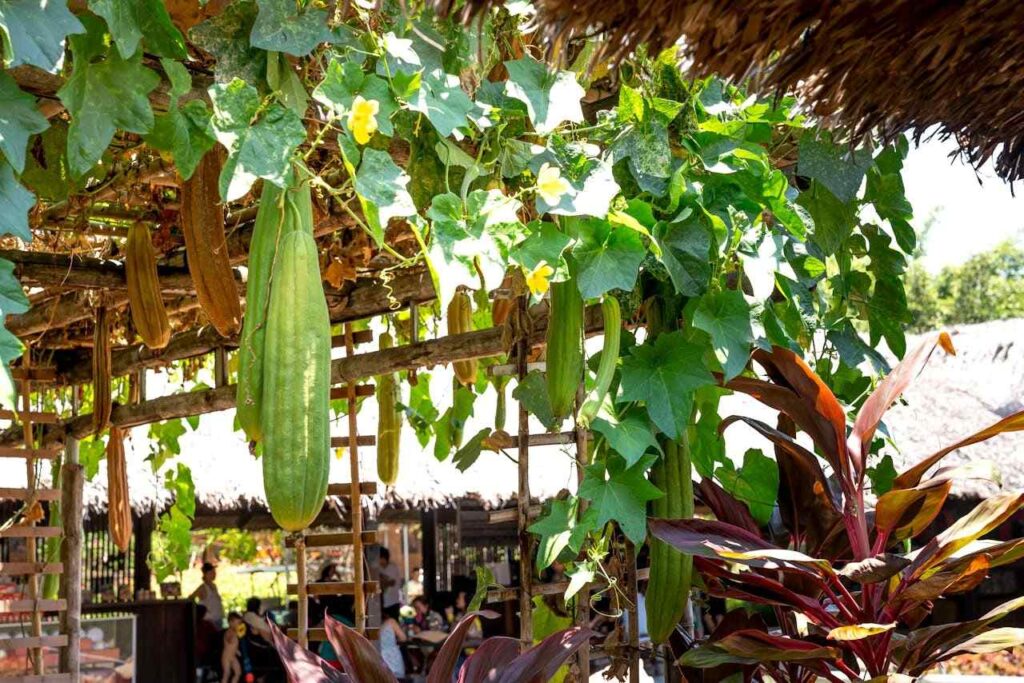
Luffa (sometimes spelt loofah) is a unique plant that comes from the Cucurbitaceae family—the same family as cucumbers, pumpkins, and gourds. If you’ve only seen luffa in stores as dried sponges, you might be surprised to learn that it starts as a long, green, squash-like fruit. When left to mature, its interior develops into the fibrous network that makes it the perfect natural sponge.
There are two main types of luffa:
- Luffa aegyptiaca (Smooth Luffa): The most common variety for soft, high-quality sponges.
- Luffa acutangula (Ridged Luffa): Has more defined ridges and a firmer texture, making it great for scrubbing.
Why Grow Luffa?
Aside from being a fun gardening project, growing luffa has some incredible benefits:
- Eco-Friendly Alternative: Unlike plastic sponges, luffa is 100% biodegradable. You won’t be sending more plastic waste to landfills or oceans.
- Multi-Purpose Use: Once processed, luffa sponges work well for bathing, dishwashing, skin care exfoliation, and even crafting.
- Edible When Young: If harvested early, luffa can be cooked and eaten just like zucchini or squash. It’s rich in vitamins and minerals.
- Therapeutic Gardening: Watching a luffa plant grow from seed to sponge is an incredibly rewarding experience, bringing a sense of accomplishment and connection to nature.
Luffa is more than just a plant—it’s an opportunity to embrace a sustainable, hands-on lifestyle. Ready to grow your own? Let’s get started!
How to Grow Luffa: Step-by-Step Guide
1. Choosing the Right Variety
First things first: Selecting the right type of luffa is crucial. There are two main species to consider:
- Luffa aegyptiaca (Smooth Luffa): This variety is ideal for producing soft, high-quality sponges. The fruits are cylindrical and smooth, making the peeling process more straightforward.
- Luffa acutangula (Ridged Luffa): Also known as angled or ridged luffa, this type has pronounced ridges running along its length. While the young fruits are edible and often sweeter, the mature fibres are coarser, making them better suited for heavy-duty scrubbing tasks.
Personal Insight: I started with Luffa aegyptiaca for my first cultivation. The smooth surface made processing simpler, and the sponges were perfect for bathing and gentle exfoliation.
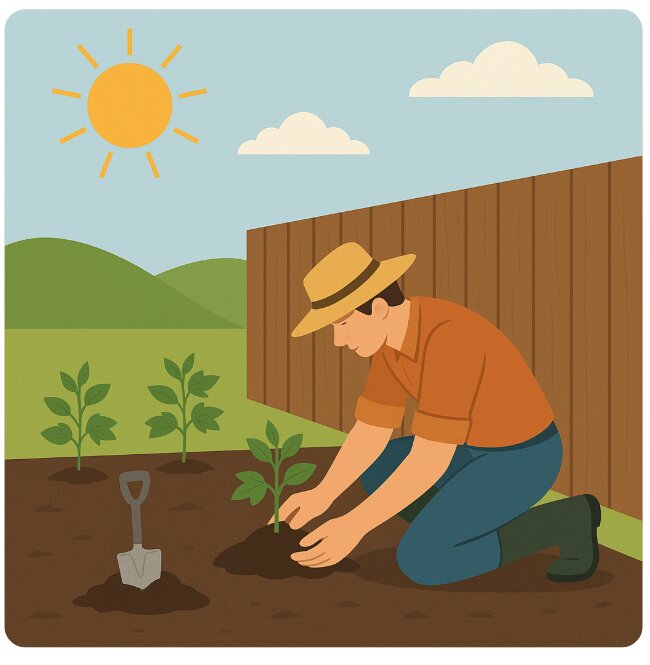
2. Selecting the Right Location
Luffa plants are sun-loving and thrive in warm conditions. Here’s what they need:
- Full Sunlight: Aim for at least 6-8 hours of direct sunlight daily. A sunny spot in your garden or a south-facing wall works wonders.
- Warm Climate: Luffas flourish in USDA zones 7-11. If you’re in a cooler region, consider using a greenhouse or starting seeds indoors to extend the growing season.
- Well-Drained Soil: They prefer soil that’s slightly acidic to neutral (pH 6.0-6.8) and rich in organic matter. Good drainage is essential to prevent root rot.
Personal Insight: I planted my luffas along a south-facing fence, ensuring they received ample sunlight. Incorporating compost into the soil provided the necessary nutrients for robust growth.
3. Planting Luffa Seeds
Getting your luffa seeds off to a good start is vital for a successful harvest.
Pre-Planting Tips:
- Soak Seeds: Luffa seeds have a hard outer shell. Soaking them in warm water for 24 hours before planting can soften the shell, improving germination rates.
- Indoor Starting: In cooler climates, start seeds indoors 4-6 weeks before the last expected frost. This gives the plants a head start, ensuring they have a long enough growing season.
Planting Process:
- Direct Sowing: Once the danger of frost has passed and the soil has warmed up, you can sow seeds directly into the garden.
- Spacing: Plant seeds 12-18 inches apart in rows to give each vine ample space to grow.
- Watering: After planting, water the seeds thoroughly to settle the soil and kickstart germination.
Personal Insight: I started my seeds indoors in biodegradable pots, which made transplanting seamless and reduced root disturbance.
4. Supporting Luffa Growth
Luffa vines are vigorous climbers, often reaching lengths of up to 30 feet. Providing proper support is crucial.
Trellising: A sturdy trellis or fence allows the vines to climb vertically, promoting straighter fruits and better air circulation, which reduces disease risk.
Expert Tip: “A well-built trellis not only supports luffa vines but also prevents fruit rot by keeping them off the ground and improving air circulation.” – Kevin Espiritu, Founder of Epic Gardening
Personal Insight: I used a combination of bamboo poles and garden netting to create a durable trellis. This setup kept the fruits off the ground and made harvesting easier.
5. Watering and Fertilisation
Consistent care ensures healthy vines and a bountiful harvest.
- Watering: Keep the soil consistently moist but not waterlogged. Deep watering once or twice a week encourages deep root growth.
- Fertilisation: Applying a balanced organic fertiliser, such as a 10-10-10 blend, every 2-3 weeks provides essential nutrients.
- Mulching: A layer of mulch helps retain soil moisture and suppress weeds, creating a more stable growing environment.
Personal Insight: I mulched around my luffa plants with straw, which conserved moisture and reduced the need for frequent watering.
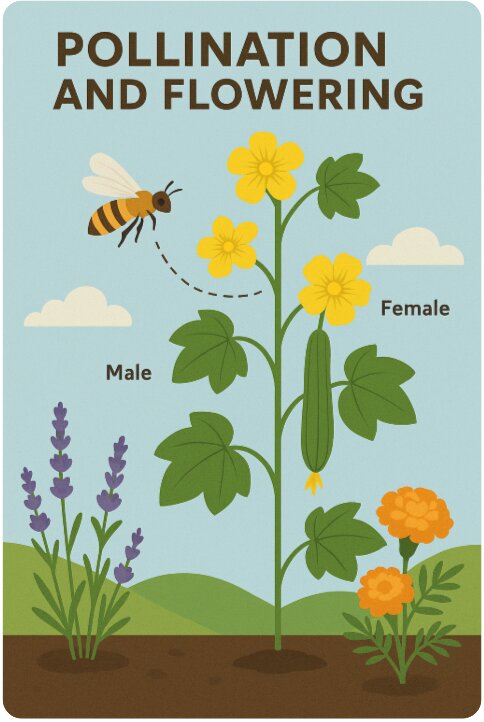
6. Pollination and Flowering
Understanding the flowering and pollination process is key to fruit development.
- Flower Types: Luffa plants produce separate male and female flowers. Male flowers typically appear first, followed by female flowers, which have a small fruit at their base.
- Pollination: Bees and other pollinators are essential for transferring pollen from male to female flowers. In areas with limited pollinator activity, hand-pollination using a small paintbrush can improve fruit set.
Personal Insight: To attract more pollinators, I planted bee-friendly flowers like marigolds and lavender near my luffa vines. This not only enhanced pollination but also added beauty to the garden.
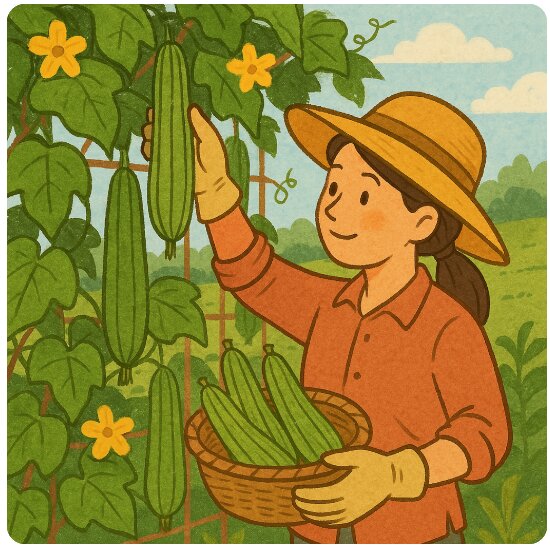
7. Harvesting Luffa
Timing your harvest correctly ensures the best quality sponges.
For Edible Use:
- Young Fruits: Harvest luffas when they’re under 6 inches long, tender, and green. At this stage, they’re excellent for culinary uses, similar to zucchini.
For Sponge Use:
- Mature Fruits: Allow the fruits to mature on the vine until they turn yellow-brown and feel lightweight.
- Seed Rattle: A good indicator of maturity is shaking the luff.
Learn More: Stages of Plant Growth
Processing Luffa Into Sponges
1. Peeling the Luffa
Once your luffa gourds have matured on the vine, turning brown and feeling lightweight, they’re ready for harvesting. The outer skin needs to be removed to reveal the fibrous sponge inside. If the skin is dry and brittle, you can gently crack it and peel it away with your fingers. For skins that are more stubborn, soaking the gourds in water for a few minutes can soften the exterior, making it easier to peel. I found that immersing the luffa in warm water not only eased the peeling process but also started loosening the seeds inside.
2. Removing Seeds and Cleaning
After peeling it, you’ll notice a multitude of seeds nestled within the luffa’s fibrous network. Gently shake the luffa to dislodge these seeds. I like to save them for the next planting season, continuing the cycle of growth. Once the seeds are removed, it’s crucial to clean the luffa thoroughly to eliminate any sap or residues. Rinsing under running water works well, but for a deeper clean and to prevent mould growth, soaking the luffa in a diluted bleach solution (about 10% bleach to 90% water) or a vinegar solution for a couple of hours is effective. This step not only sanitises the sponge but also helps in whitening it, enhancing its aesthetic appeal.
3. Drying and Storing
Proper drying is essential to ensure your luffa sponges are durable and free from mould. After cleaning, squeeze out any excess water and place the luffa in a well-ventilated area with ample sunlight. I prefer laying them on a drying rack outdoors, allowing air to circulate freely around them. Depending on the humidity and temperature, drying can take several days. Once completely dry, the luffa should feel firm and lightweight. Store your dried sponges in a dry place until you’re ready to use them. I’ve found that placing them in a breathable cotton bag helps maintain their quality over time.
Recent Developments in Luffa Processing
The growing interest in luffa as a sustainable alternative to synthetic sponges has led to innovative processing techniques aimed at enhancing its quality and applications. One notable example is Ibérica de Esponjas Vegetales, a company based in Caldas de Reis, Galicia, Spain. Founded by Juan Carlos Mascato 15 years ago, the company produces natural sponges from luffa plants using hybrid H3 seeds developed through genetic improvements. They employ a unique post-harvest treatment involving fermentation with thermal water, resulting in high-quality, biodegradable sponges. Their production has reached approximately 200,000 units annually, with 90% exported to countries such as Korea, New Zealand, and Finland.
In addition to traditional sponge production, recent research has expanded the applications of luffa-based materials. For instance, a study published in RSC Advances detailed the fabrication of a superhydrophobic loofah sponge via a versatile, environmentally friendly, and low-cost dip-coating strategy. This modified sponge exhibited excellent superhydrophobic and superoleophilic properties, making it highly effective for oil-water separation in harsh environments. The process involved coating the loofah sponge with waterborne polyurea and fused silica nanoparticles, resulting in a material capable of efficient oil-water separation even after multiple abrasion cycles.
Furthermore, luffa-derived materials have shown promise in environmental remediation. Researchers have developed nanocellulose/chitosan nanocomposites based on loofah sponge for the efficient removal of methylene blue dye from wastewater. These composites demonstrated high adsorption capacities, with the nanocellulose/chitosan composite achieving an adsorption capacity of 301.20 mg/g at 47°C. The study highlighted the potential of luffa-based materials in water treatment applications, offering a sustainable and effective solution for dye removal.
These developments show the versatility of luffa as a raw material, not only in producing biodegradable sponges but also in creating advanced materials for environmental applications. The combination of traditional knowledge and modern scientific approaches continues to expand the potential uses of luffa, contributing to sustainable practices and environmental conservation.
Common Problems and Solutions in Growing Luffa
1. Poor Germination
The Problem: Your luffa seeds just aren’t sprouting. You plant them, wait, and nothing happens.
The Cause: Luffa seeds have a very hard outer coat, making it difficult for water to penetrate and start the germination process.
The Solution: Soak the seeds in warm water for 24 hours before planting. This softens the shell and helps the seed wake up and grow faster.
2. Yellowing Leaves
The Problem: Your luffa plant’s leaves are turning yellow instead of staying a healthy green.
The Cause: A lack of nutrients, especially nitrogen, which is essential for leaf growth.
The Solution: Use a balanced fertiliser or add compost to the soil. A little organic matter goes a long way in keeping your plants healthy.
3. Small or Misshapen Fruits
The Problem: Your luffa fruits are coming out small or oddly shaped.
The Cause: Poor pollination—luffa plants rely on bees and other pollinators to develop properly.
The Solution: If you don’t see many bees around, you can hand-pollinate by using a small brush to transfer pollen between flowers. You can also plant flowers nearby to attract more pollinators.
Learn More: Green Pumpkins: History, Cultivation, and Sustainability
Conclusion
Growing luffa and making your own natural sponges is more than just a hobby—it’s a commitment to sustainability, self-sufficiency, and eco-friendly living. Whether you’re a seasoned gardener or a beginner, this rewarding process will leave you with a sense of accomplishment every time you use your homegrown sponge.
So, why wait? Grab some seeds, plant your luffa, and enjoy the journey toward a greener lifestyle!