How to Plant and Grow Garlic: An Expert Guide with Practical Insights
Garlic is one of those magical plants that’s both incredibly useful in the kitchen and surprisingly easy to grow. Whether you love cooking with it, appreciate its health benefits, or just want a low-maintenance crop in your garden, garlic is a fantastic choice. It’s hardy, doesn’t need much attention, and thrives in different climates, making it perfect for beginners and experienced gardeners alike.
I remember the first time I planted garlic—I was nervous about getting it right, but to my surprise, it grew beautifully with very little effort. The feeling of pulling up fresh, homegrown garlic from the soil was pure satisfaction. Plus, nothing beats the taste of garlic you’ve grown yourself—it’s richer, more flavorful, and fresher than anything from the store.
In this guide, I’ll take you step by step through everything you need to know to grow garlic successfully. We’ll cover when and how to plant, the best soil conditions, how to care for your garlic, and when to harvest. Along the way, I’ll share expert advice, scientific research, and real-world experiences to help you get the best results from your garlic crop. Let’s get started!
In This Article
- Choosing the Right Garlic Variety
- Preparing the Soil
- Caring for Growing Garlic
- Common Problems and Solutions
- The Sustainability of Growing Garlic
- Conclusion:
Choosing the Right Garlic Variety
Before planting, it’s crucial to choose the right type of garlic for your climate and culinary preferences. There are two main categories:
Hardneck vs. Softneck Garlic: What’s the Difference?
| Garlic Type | Best For | Key Features |
|---|---|---|
| Hardneck (Allium sativum var. ophioscorodon) | Cold Climates | Stronger flavour; produces edible scapes, easier to peel, shorter shelf life |
| Softneck (Allium sativum var. sativum) | Warmer Climates | Longer storage (up to 12 months), more cloves per bulb, no scapes |
Hardneck Garlic: If you live in a place with freezing winters—think Northern Europe, Canada, the northern U.S., or mountainous regions of Asia—you’ll want to grow hardneck garlic. This type of garlic is more resilient to cold and produces scapes (a long, curly stem that grows from the bulb), which you can harvest and cook with. Hardneck garlic has fewer cloves per bulb, but each clove is larger and easier to peel, making it a favourite for home cooks. The downside? It doesn’t store as long as softneck varieties.
Softneck Garlic: If you live in a warmer climate—like India, parts of Africa, the southern U.S., or Mediterranean regions—softneck garlic is the way to go. It doesn’t produce scapes, but it has more cloves per bulb and can last up to a year in storage if kept in a cool, dry place. That’s why most garlic sold in supermarkets is softneck—it’s easy to grow in bulk and keeps for a long time.
Pro Tip:
- If you’re dealing with harsh winters, go for hardneck garlic.
- If you want garlic that lasts longer in storage, softneck is your best bet.
- If you’re unsure, try planting both and see which one thrives best in your area!
When Is the Best Time to Plant Garlic?
Garlic is usually planted in the fall so that it can establish roots before winter. This gives it a head start in spring, leading to bigger, healthier bulbs. However, the best time to plant garlic depends on your location.
| Climate | Best Planting Time |
| Cold Climates (Europe, Northern U.S., Canada, parts of China) | Late September to early November |
| Warm Climates (Africa, India, Southern U.S., Southeast Asia) | November to January |
If you missed the fall planting window, don’t worry! You can plant garlic in early spring, but the bulbs will usually be smaller than those planted in fall.
Why Fall Planting Works Best
When you plant garlic in the fall, the cloves have time to develop strong roots before winter sets in. Then, once temperatures rise in spring, the garlic starts growing rapidly. This results in bigger, healthier bulbs compared to spring-planted garlic, which has less time to grow before the hot weather arrives.
What If You Live in a Tropical Region?
If you live in a very hot, humid climate, growing garlic can be tricky, but it’s not impossible. Here are a few tips:
- Choose softneck garlic varieties, as they tolerate heat better.
- Plant garlic in the coolest months of your region (November–January for places like India, parts of Africa, and Southeast Asia).
- Provide shade during peak heat and mulch the soil to retain moisture.
Learn More: Green Pumpkins: History, Cultivation, and Sustainability
Preparing the Soil
What Kind of Soil Does Garlic Need?
Garlic thrives in well-draining, nutrient-rich soil with a pH between 6.0 and 7.0—basically, not too acidic and not too alkaline. If your soil is too heavy or clay-like, your garlic might struggle to grow properly. Instead of big, firm bulbs, you could end up with tiny, underdeveloped ones. Nobody wants that!
So, let’s get that soil ready the right way.
Steps to Prepare Your Garlic Bed
- Find a Sunny Spot: Garlic loves the sun. Pick a spot in your garden that gets at least 6 hours of direct sunlight every day. More sunlight means better growth and bigger bulbs.
- Loosen Up the Soil: Garlic roots don’t like compacted dirt. Use a garden fork or shovel to loosen the soil 8–10 inches deep. This gives the roots plenty of room to grow and take up nutrients.
- Add Organic Matter: This is where the magic happens. Mixing in compost or well-aged manure will provide the nutrients garlic needs. It also improves soil texture, making it easier for water to drain while keeping the right amount of moisture.
- Ensure Good Drainage: Garlic hates sitting in soggy soil—it can rot if the water doesn’t drain properly. If your soil tends to hold water, consider planting in raised beds or adding sand or organic material to improve drainage.
Expert Tip: Multiple studies have demonstrated that incorporating organic compost, such as vermicompost, into the soil significantly enhances garlic yields. Research conducted in Eastern Ethiopia found that applying vermicompost improved both the growth and yield parameters of garlic. Another study published in the Journal of Agricultural Science revealed that combining compost with inorganic fertilizers resulted in larger and heavier garlic bulbs. Additionally, research on vermicompost-amended substrates confirmed its effectiveness in boosting garlic production. So, don’t skip the compost—it’s a game-changer for your harvest!
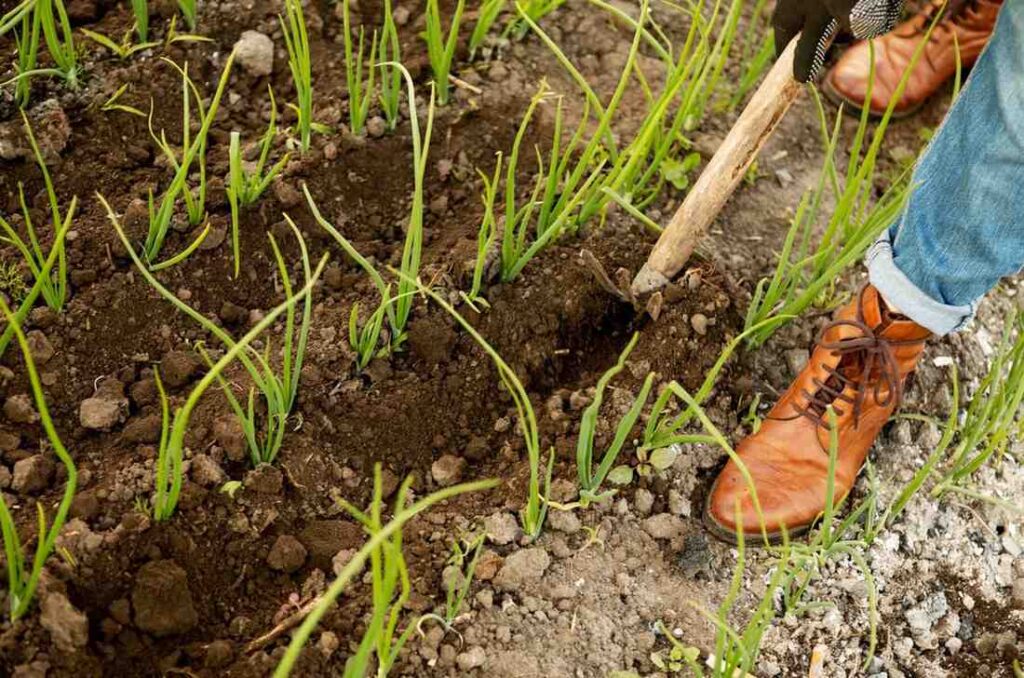
How to Plant Garlic
Once your soil is ready, it’s time to plant! Here’s exactly what to do:
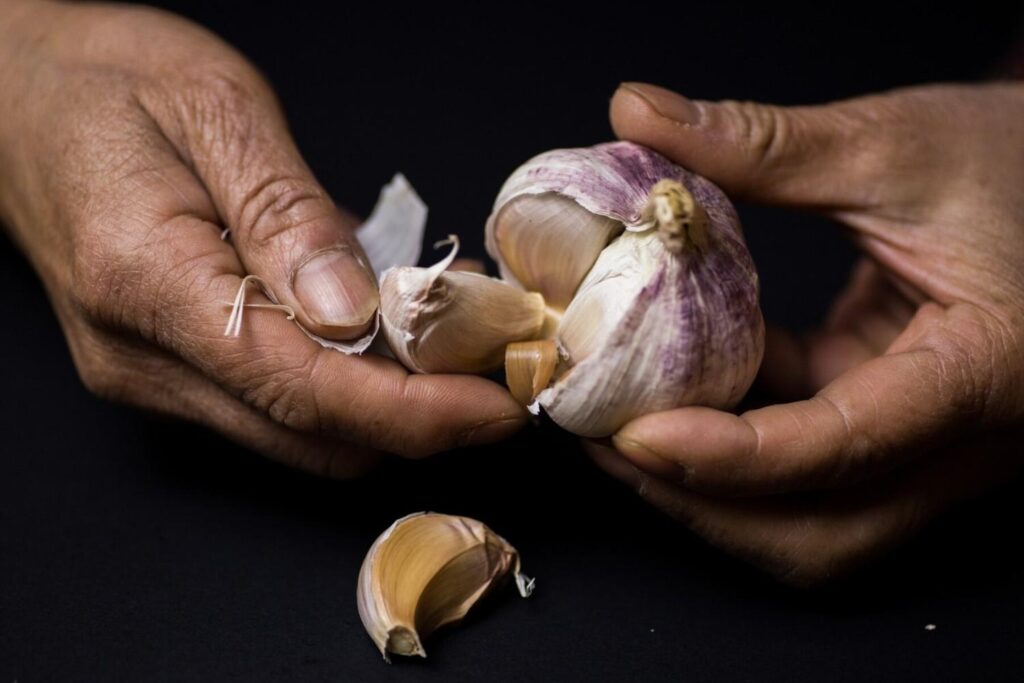
- Break Apart the Bulb
Take a whole garlic bulb and carefully separate the cloves. Keep their papery skins on—that helps protect them. This practice is recommended by the University of Georgia Cooperative Extension, which advises selecting larger outer cloves for planting, as they tend to yield larger bulbs.
- Plant Each Clove
Push each clove into the soil about 2 inches deep, with the pointed end facing up. Give them 6 inches of space so they don’t compete for nutrients. - Cover with Soil and Mulch
Gently cover the cloves with soil and then add a layer of mulch like straw, leaves, or grass clippings. This helps protect against frost and keeps weeds down. - Water Lightly
Water just enough to keep the soil evenly damp but not soggy. Overwatering can cause rot, while too little water can stunt growth.
What I Learned the Hard Way
The first time I planted garlic, I made a classic beginner mistake—I spaced my cloves way too close together. I thought, “More garlic in less space? That sounds great!” But when harvest time came, my bulbs were tiny and disappointing. Now, I always follow the 6-inch spacing rule, and my garlic has never been better.
Take it from me: give your garlic room to breathe, and it will thank you with bigger, healthier bulbs!
Caring for Growing Garlic
Watering:
Garlic needs consistent moisture, but not too much. If the soil dries out completely, growth will slow, and small bulbs will form. If it’s too wet, the roots can rot.
- In the U.S. & Europe: Water about 1 inch per week, more if it’s dry, less if it’s rainy. Reduce watering once the leaves start yellowing in late spring.
- In Africa & Asia: If you’re in a hot climate, garlic may need extra watering, especially in sandy soils. Water deeply every 3–4 days, ensuring moisture reaches the roots. Avoid frequent, shallow watering.
- In Rainy Climates: Raise beds or improve drainage to prevent rot. Water only when the top inch of soil feels dry.
Fertilizing:
Garlic grows best with a nitrogen boost in early spring when the leaves are developing. Use a nitrogen-rich fertiliser like composted manure, fish emulsion, or organic blood meal. Apply every 3–4 weeks until the bulbs start forming. Avoid over-fertilising in late spring—it encourages leaf growth at the expense of bulbs.
Keeping Weeds Away:
Garlic doesn’t like competition. Weeds steal nutrients and water, stunting growth. The best approach is hand weeding—be gentle, as garlic roots are shallow and delicate. Adding mulch (straw, dried leaves, or grass clippings) can help suppress weeds while keeping the soil moist.
Pests to Watch For:
Garlic is naturally pest-resistant, but a few bugs can still cause trouble:
- Onion Thrips: These tiny insects suck the juice from leaves, causing yellow streaks. Use neem oil or insecticidal soap if needed.
- Nematodes: These microscopic worms attack roots, causing weak plants. Rotate crops yearly and add organic matter to keep the soil healthy.
Harvesting & Curing Garlic for Long-Lasting Flavour
Knowing when to harvest is key. Too early, and the cloves won’t form fully. Too late, and the bulbs start splitting.
Signs It’s Time to Harvest:
- Leaves turn yellow and brown, usually in mid-summer.
- Bulbs feel firm and have distinct cloves.
- The tops begin to fall over, signalling maturity.
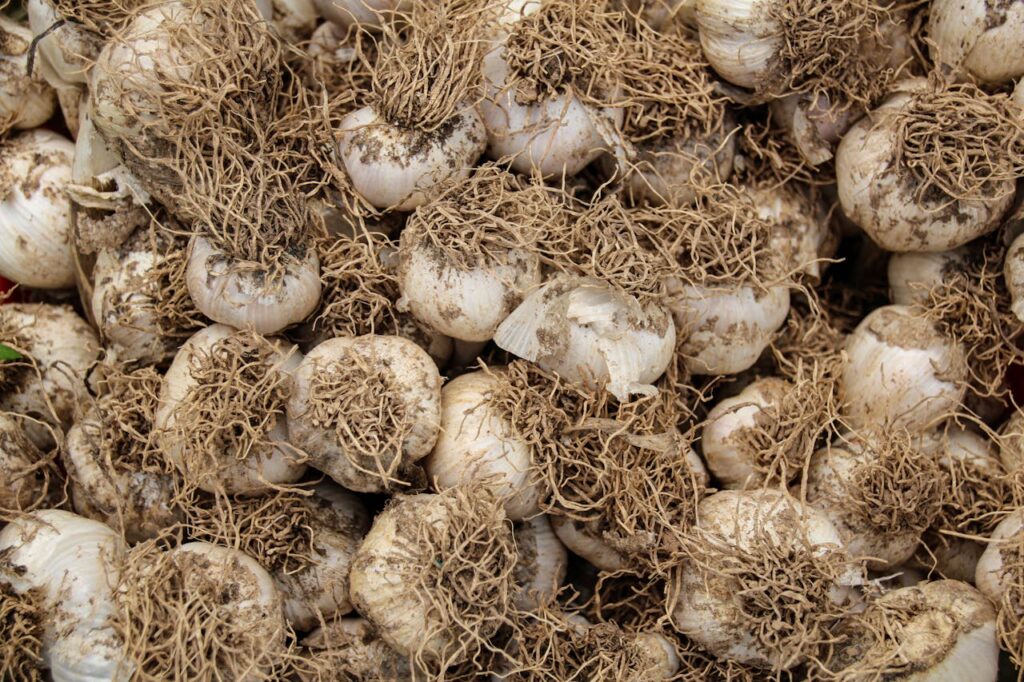
How to Harvest Without Damage:
- Loosen the soil around the bulbs with a fork or trowel. Don’t pull them out forcefully—you could break them.
- Shake off loose dirt, but don’t wash—moisture leads to rot.
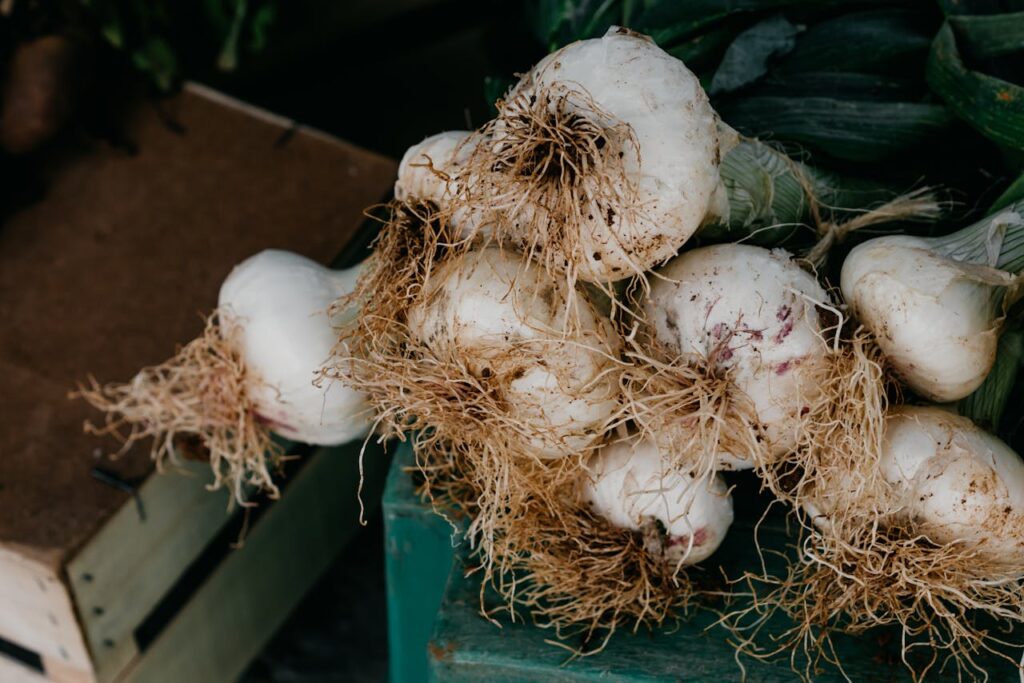
- Cure your garlic by hanging or spreading bulbs in a shady, well-ventilated area for 2–3 weeks. This helps dry the skins, locking in flavour and shelf life.
Storage:
- Softneck garlic: Braid the stems and hang them in a cool, dry place.
- Hardneck garlic: Store in mesh bags or open containers where air can circulate.
Common Problems and Solutions
1. Small Bulbs
Why it happens: If your garlic bulbs are small, it’s usually because they were planted too close together or the soil didn’t have enough nutrients.
How to fix it: Make sure to plant each clove about 6 inches apart. Garlic needs room to grow! Also, feed your soil with good-quality compost or aged manure before planting. Nutrient-rich soil makes a huge difference.
2. Yellow Leaves
Why it happens: Yellow leaves can be a sign of overwatering or a lack of nutrients, especially nitrogen.
How to fix it: If your soil is too wet, cut back on watering. Garlic doesn’t like sitting in soggy soil. If your garlic is lacking nutrients, try adding a balanced organic fertiliser, especially one with nitrogen, in early spring.
3. Mouldy Bulbs
Why it happens: Garlic stored in a humid or poorly ventilated space can develop mould.
How to fix it: Keep your garlic in a dry, airy place. Mesh bags or braiding softneck garlic for hanging work are great. Avoid plastic bags, as they trap moisture and encourage mould.
The Sustainability of Growing Garlic
Garlic is an eco-friendly crop with minimal water needs and natural pest-repelling properties.
Sustainability Benefits:
1. Less Water, Less Waste
Garlic doesn’t need a lot of water to thrive. Unlike thirsty crops like lettuce or tomatoes, garlic does just fine with occasional deep watering, making it a great option for water-conscious gardeners. Once it’s established, a little rain here and there is often enough to keep it going.
2. Natural Pest Control
One of garlic’s hidden superpowers is its ability to keep pests at bay. Aphids, cabbage worms, and even some fungal diseases tend to stay away from garlic’s strong scent. This makes it a fantastic companion plant for tomatoes, peppers, and carrots, helping protect them without the need for chemical sprays.
Learn More: 15 Best Eco-Friendly Insect Control Methods
3. Fewer Chemicals, Healthier Soil
Store-bought garlic is often treated with chemicals to extend its shelf life and prevent sprouting. When you grow your own, you know exactly what’s going into your soil and onto your plate. No pesticides, no synthetic fertilisers—just pure, homegrown goodness.
4. Lower Carbon Footprint
Most garlic in grocery stores travels thousands of miles before reaching your kitchen. That means fuel consumption, plastic packaging, and refrigeration—all of which contribute to greenhouse gas emissions. Growing garlic at home eliminates that waste and helps reduce your overall carbon footprint.
Conclusion:
Planting and growing garlic is one of the easiest ways to enhance your garden while reaping culinary and health benefits. Whether you’re looking for bold flavours in your dishes or natural immune support, garlic is a must-grow crop.
Actionable Steps:
- Choose the right garlic variety for your region.
- Prepare nutrient-rich, well-drained soil.
- Plant cloves in the fall for the best results.
- Maintain regular watering and weeding.
- Harvest and cure garlic properly for long-term storage.
By following this guide, you’ll have a thriving garlic harvest year after year. Now, get your hands in the soil and start growing!